
Even the best camera drone is only as good as your ability to take good shots. Thankfully, DJI makes it super easy to take great photos using their intuitive photo modes. There are six of them, each providing an easy way to take photos like a pro.
Not all DJI drones have these photo modes. But all have some basics ones that you are still helpful especially for a beginner aerial photographer.
To see which ones you can access with your drone go to camera settings on the DJI GO app and then tap on Photo.
Here are the photo modes with tips on how to use them.
Single Shot Mode

This is the basic default camera setting that is in every DJI drone. Simply press the shoot button and the camera takes a single shot.
You don’t get any extra assistance from the drone. It requires some experience and skills to take a good shot especially since you have to fly and shoot at the same time.
When to use single shot mode: When you are testing your photography skills or when you quickly need to take a shot of something and you have no time to select another mode. Also ideal for skilled and experienced aerial photographers.
Burst Shots Mode
The burst or multiple shots mode is great for shooting moving objects. With the single shot mode, there is a high chance you won’t get the perfect shot.
Burst mode allows you to take 3 to 7 shots in quick succession. At least one of those photos will be perfect.
When to use burst/multiple shots mode: When you want to be sure you’ll get a perfect shot. It’s especially ideal for shooting moving objects.
Auto Exposure Bracketing (AEB) Mode

AEB mode allows you to take 2-5 pictures with different exposures.
This is helpful in tricky lighting situations where you are not sure about the correct exposure setting. You could play around with the settings until you get the perfect photo but sometimes the scene changes too quickly to afford you that luxury. For example, during a sunset.
The AEB mode lets you take several photos with varying exposures. One can be underexposed, another overexposed and another somewhere in the middle.
You can then merge the pictures later when editing to create an HDR image.
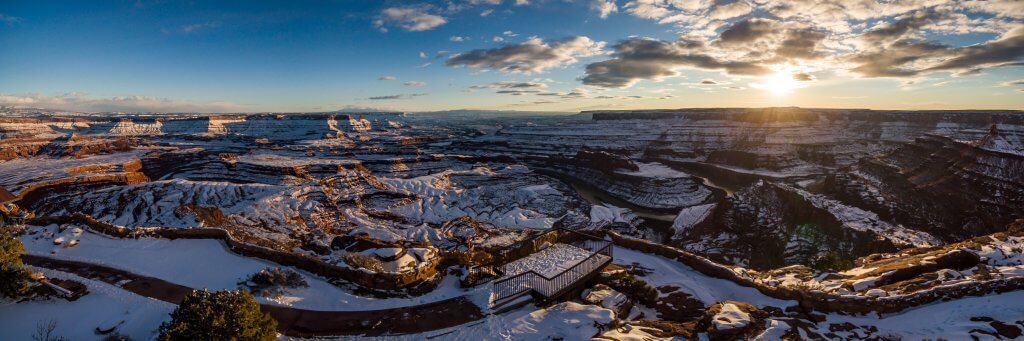
When to use AEB mode: When you are not sure which exposure setting is right for the situation. It’s especially ideal in situations where there are highly contrasting bright and dark areas such as a sunset or water and land.
HDR Mode
This is the same as AEB only that you don’t have to manually merge the pictures when editing. The camera will do that for you. It will combine the best aspects of each picture to create a final image with a High Dynamic Range (HDR).
When to use HDR mode: When you need to take photos of landscapes or scenes with highly contrasting colors or lighting. E.g. Landscape photos, subjects in sunlight and low-lit scenes.
Timed Shots
Timed shots are pictures taken after a certain number of seconds (minimum 2sec for JPEG and 5sec for RAW). You can choose between 2 and 60 seconds.
Timed shots are handy for creating time-lapse videos of things like traffic, the sunset/sunrise or any other scene.

When to use timed shots: When you want to create a time-lapse video.
Pano Mode
This one is available only in newer DJI camera drone models such as the Spark and Mavic Pro.
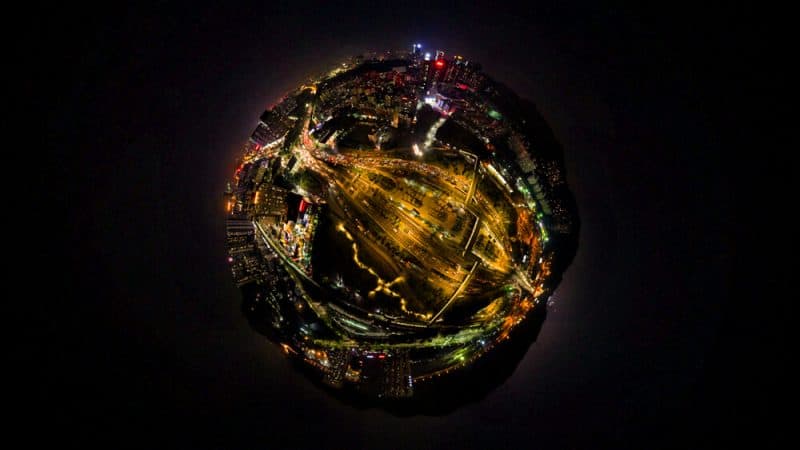
The pano (short for panoramic) mode lets you take wide angle photos. There are several types of pano modes. DJI Spark has vertical, horizontal, 180 degrees and sphere pano modes.
In each mode, the camera stitches together a number of photos to create one large wide angle image. Vertical mode uses 3 photos, horizontal uses 9 and the 180-degree mode stitches together 21 photos.
The sphere mode takes numerous spherical images and stiches them together to create one large spherical photo.
See this handy guide by DJI on how to use each pano mode in your Spark drone.
Now, remember it’s not all about point and shoot. Even with these modes, there is still some skill and experience required to take decent photos. Practice a lot and constantly challenge yourself with different scenes and situations.
Happy shooting!